TL;DR After spending two months with the ZSA Voyager (incl. the Navigator), I finally get the hype. It's not perfect, but it might be the most balanced split ergonomic keyboard I've ever had.
A Year Of Splits, And A Wink.
It's been pretty much a year since I got my first truly split keyboard, and ever since then, I have been infatuated by them. The form factor was a big surprise to me, and although I occasionally still switch back to unibodies (mostly for funsies), as one commenter put it, I too can no longer split myself from them.
During my roughly 12 month venture, I came across many suitors, each more enticing than the other, but one particular bachelor kept winking at me from across the room. It was only after the release of the trackball attachment that I could no longer resist. After all, I do love playing with my balls.
Full disclaimer: the Voyager along with the Navigator attachment was sent to me by ZSA, the company that makes them. I reached out first and asked if they would be so kind as to send me one over. Surprisingly they obliged, probably because they've never seen a video of this channel (or read an article!) and are unaware of the countless ball jokes I'll be throwing around the court. But more importantly, they had no input, and didn't see any of this in advance.
What follows is my two month report, after using the Voyager and the Navigator as my daily driver at the office, a writer of scripts, and the primary tool in charge of editing my videos.
Hardware: Heft, Steel, And A Snap.
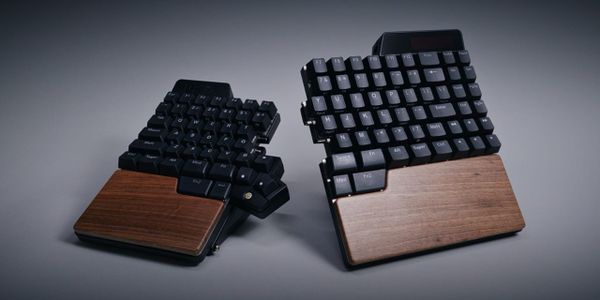
I keep repeating myself across reviews and even device categories when I say this, but I was once again caught off guard when I unboxed and lifted the Voyager out of its shipping container. It wasn't just the helpful instructions for newcomers (more on those later). It was the feel and heft of the device itself that caused a slight gasp of mine. Maybe I'm just easily impressed. With the asking price of $365 though, it better be, and that's without the trackball.
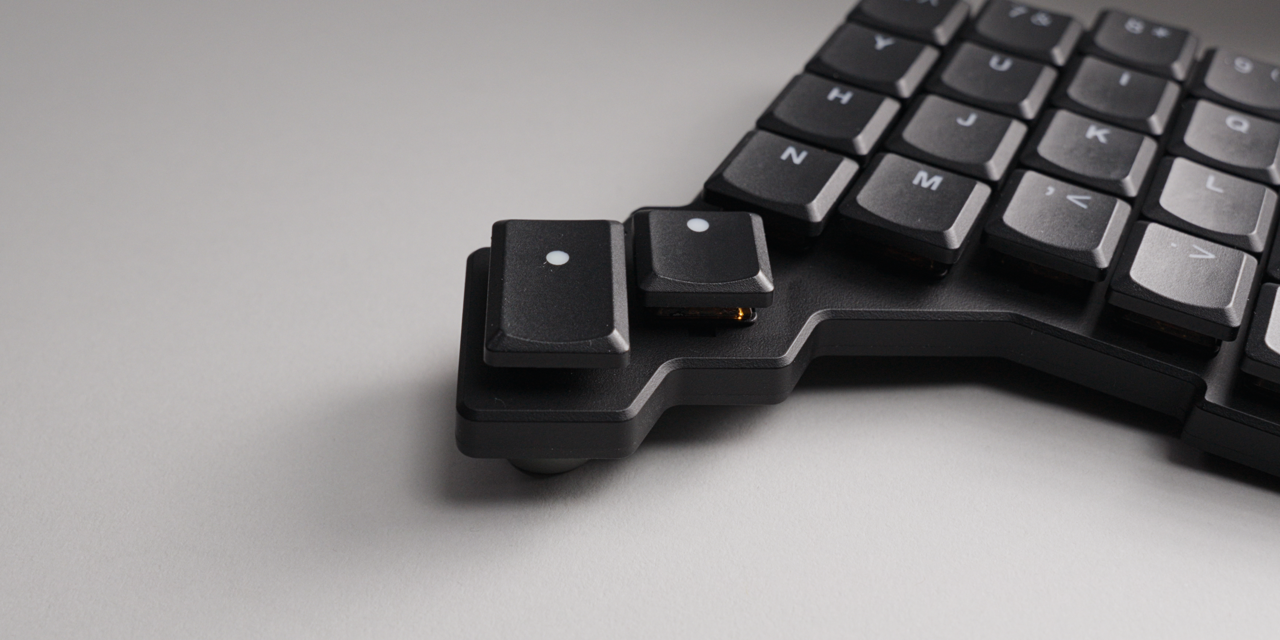
In its defense, the solid feel isn't the only selling point. I actually liked the look way more than anticipated. I'm a firm enjoyer of minimal and understated designs, but on pictures the Voyager never really won me over. Even in videos it looked, to be honest, a bit boring. The lack of a third thumb button always put me off too. My favorite split layout is the Corne, which has these three wonderfully fanned out buttons at the bottom. On smaller layouts that becomes very handy, letting you switch and jump around layers without fussing much.
The rest of the board feels anything but fragile. The top is plastic, but solid, with a slightly rough but satisfying matte texture. Flipped around, you're greeted by an entirely steel underbelly. You heard that right: STEEL, not aluminium like usual. It's likely what gives the Voyager that surprisingly substantial weight. 203 grams per half doesn't sound like much, but for the small form factor, it's just about enough to call it premium.
If I had to critique one thing about the keycaps, it would be the slightly plasticky feel. I also somehow managed to break one of the teeth off during a hasty removal, which I admit was on me. I went in on an angle and, yeah, it snapped. There's enough left to keep it attached and it hasn't fallen off since, which has been a while because I broke it on the first day. A new record and low of mine.
Holy Nut!
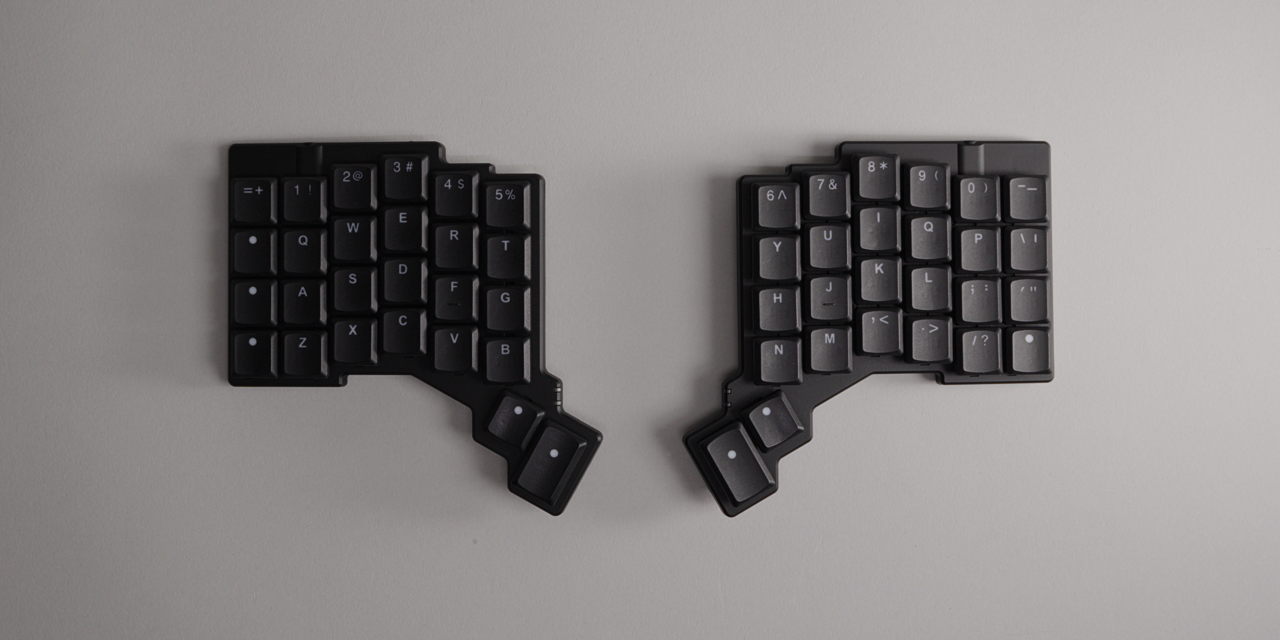
Unlike a Corne or a 40% keyboard, the Voyager retains the numbers row. That makes it closer to a 60% keyboard in size, just split in half. It might sound weird, but I think there's more than just a numbers row at play here. It hints at an overarching theme: a deliberate choice for what most people might actually want in a keyboard.
The same goes for the caps. The lettering is sharp and superbly level, and the shine-through is as good as they come. If you don't like them, you can replace them with any other Choc keycaps. At first I was surprised that mine shipped without any touch typing markers, those little lines on the F and J keys that tell you where the home row is. I thought it was an oversight. On the contrary, ZSA knows its potential user base. They didn't forget about it, they just didn't want to assume what your preferred layout might be.
So you not only have F and J in the box, you also get H, N, U and T, which spells holy nut. A subliminal message to sell you their trackball? Probably not. But I like this a lot. There's help where it's needed, and options where possible.
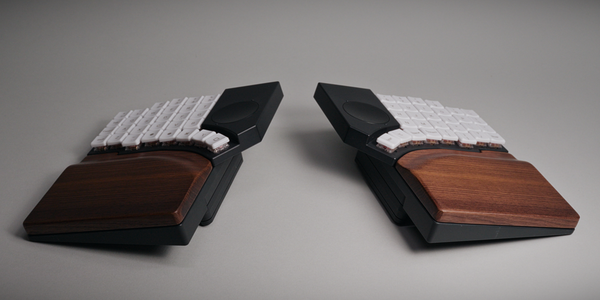
Tenting, Magnets, And Portability.
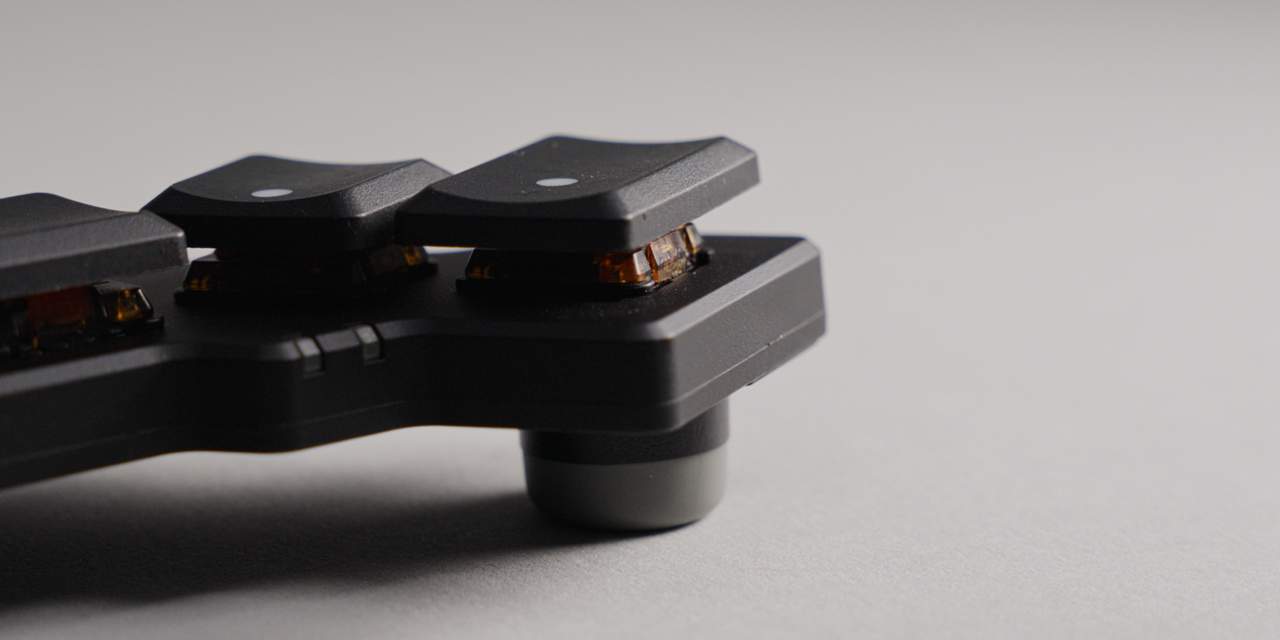
The steel underbelly isn't just for the feels. Apart from the magnetic feet, it has several attachment points for various accessories, including a quarter inch thread adapter so you can mount each half to a tripod. If you're not as versed in splits, you might wonder why anyone would mount keyboards on tripods. It's not to showcase their radiating beauty in a public space (although that isn't out of the question). It's to get them into a position that's most natural for you to type on, commonly referred to as tenting. There are various desk mounts available, or you can rig something together from camera gear yourself, like I did.
The included magnetic feet do the same job, just less extreme. It's similar to what my favorite Corne, the Boardsource Unicorne, has: one height, set or not set. Both the Voyager and the Unicorne technically have two levels, flat and not flat. I was a little hesitant about the magnets at first, with ongoing anxiety about losing them in a quick toss into a bag. That worry vanished fast. They have an absurdly strong hold, plus three little dimples to secure and align them properly.
Then there's the included carrying case, which based on the pictures I also didn't expect to like. Most boards like this ship with hardshell cases, or at least mine did, but those have their downsides too: bulkiness. This one in contrast quickly became my favorite. It fits both halves with the feet still attached, and the resulting convenience is something I am no longer willing to give up. I should mention this wasn't quite the intended use. The case originally had a bookmark in the middle as a dedicated hold for the feet, which I removed and immediately forgot about.
That made the entire transport and setup superbly quick and easy, if it weren't for the cable, or cables, as there are two. A single USB-C going into your computing device of choice, and a TRRS cable to connect the two halves together. There's a plenty long one in the box, seemingly for a giant. If you're familiar with splits, especially DIY ones, you'll know there's a danger of shorting the board depending on the order in which you connect the parts. ZSA assured me there are enough safety measures to prevent that, and I will attest: I plugged and unplugged this twice daily in various, creative dribbling orders.
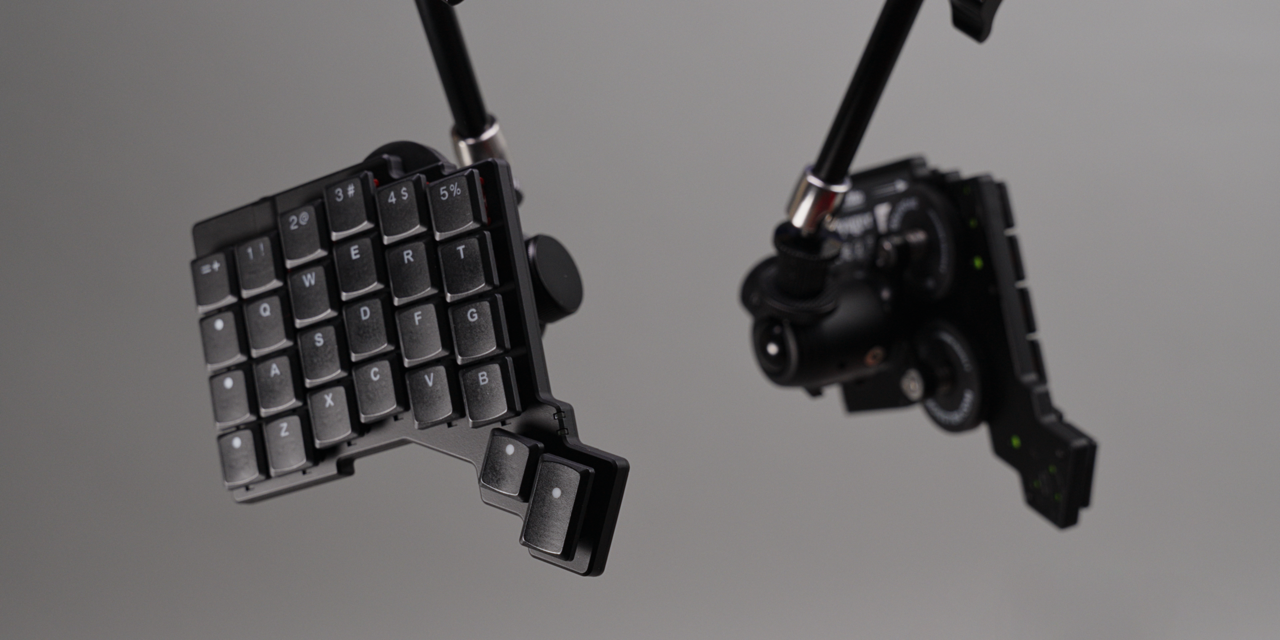
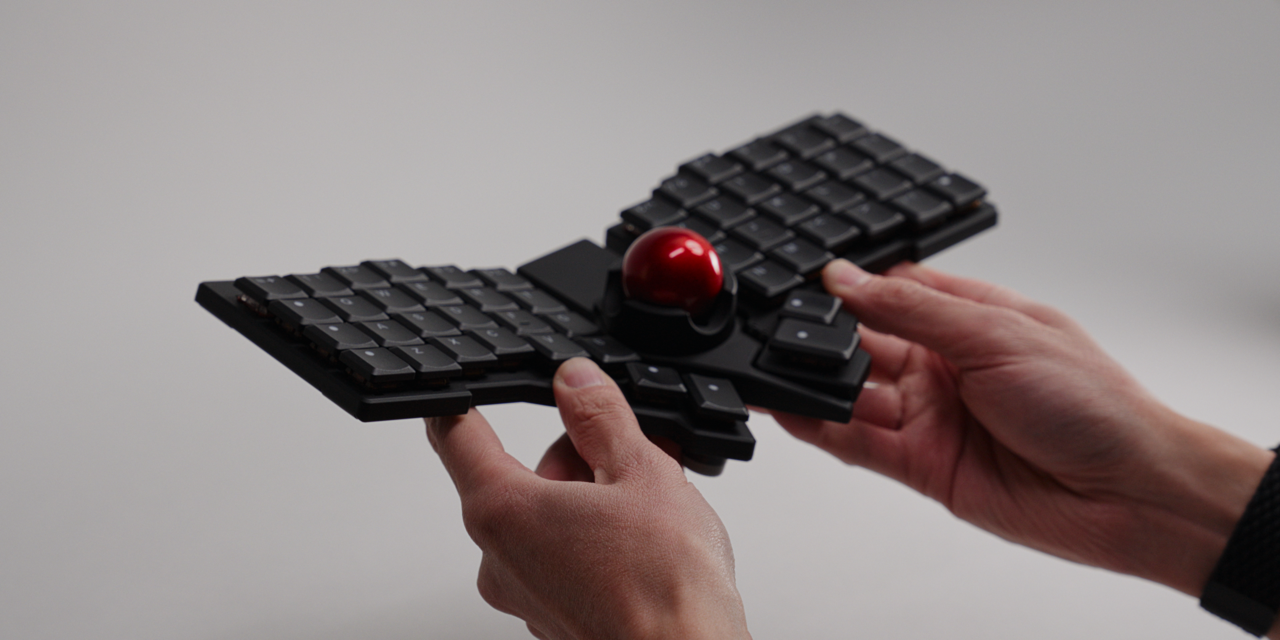
The Navigator: $169 Of Trackball Joy
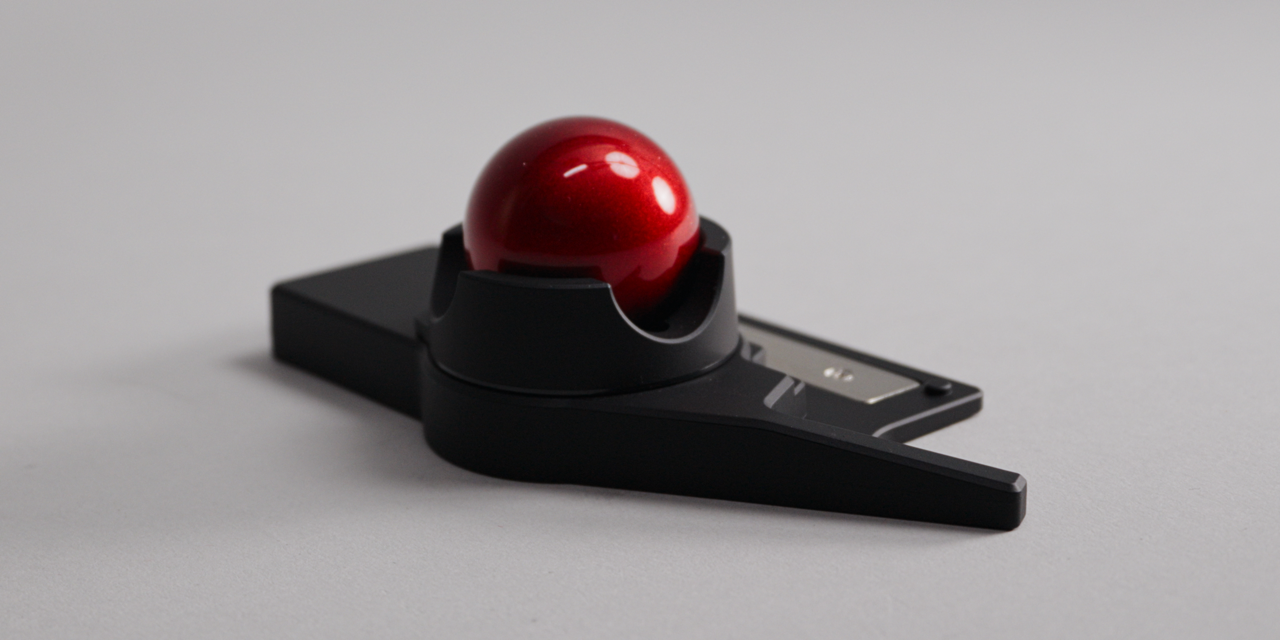
I'll admit, I'm partially drawn to keyboards that do more than just keyboard things. Combining multiple peripherals into one scratches a particular itch of mine. Enter the Navigator, a $169 trackball attachment exclusively made for the Voyager, that even comes with its own brief carrying case (which I'm going to nitpick about, because I wish I could carry everything everywhere all at once).
The ball pit clings onto one half of the Voyager, even more forcefully than the tenting feet. That doesn't mean it can be installed on either side though. During your purchase you must decide: do you lean left or right? A difficult question to ponder. After a short walk, I was certain. Right is the answer. Tenting feet aren't a requirement to use the Navigator either. Things won't be symmetrical, but it works just fine.
Attaching it isn't the whole job. You also have to wire it up, to the detriment of my cable aversion. Unlike the Naya Create where modules connect seamlessly via magnets and pins, this feels almost old school. In return, reliable. The included cable is also much nicer than the original USB-C, so I actually consider it a bit of a visual upgrade. The last piece is the ball itself, which simply drops into the crater, before it's off to the fondling.
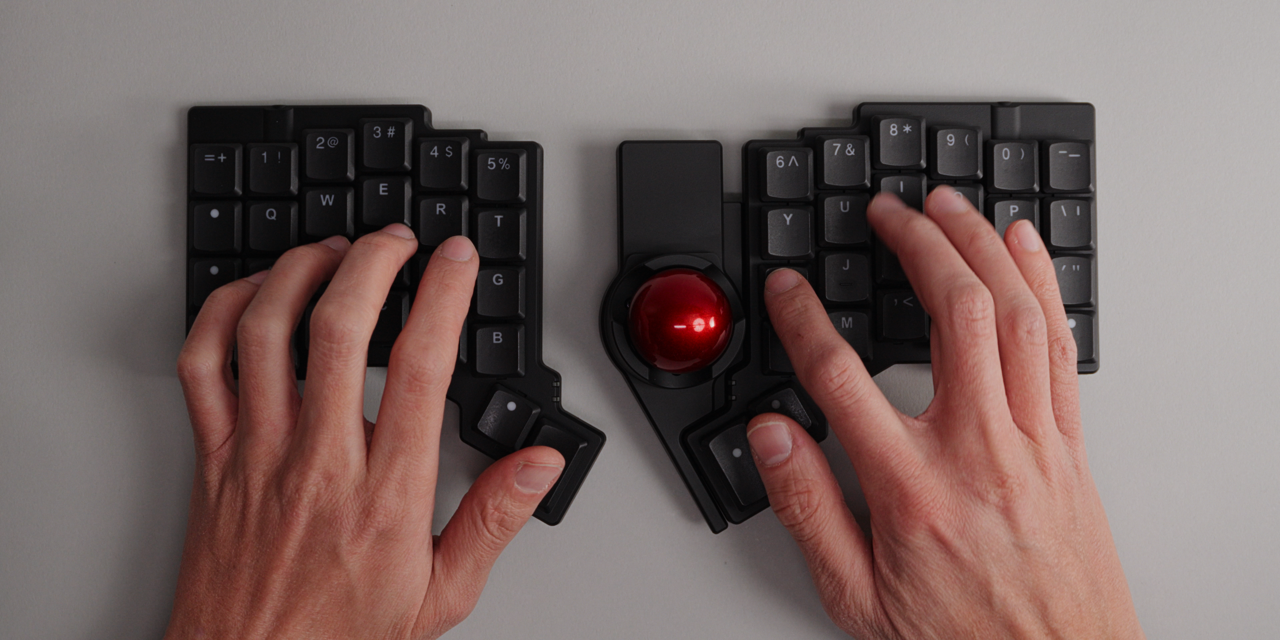
The Navigator is incredibly fun to use, and if you've ever had a trackball you'll feel right at home. There's a learning curve though. There are no dedicated mouse buttons. By default, your D and F keys become your left and right click. They're not gone permanently. To activate them, you have to touch the ball first. The keyboard then enters mouse mode, which is just another configuration layer. So simple, so effective. I have a feeling this is how DIY boards with similar setups work too.
The downside is that you can occasionally graze the ball by accident and the board will flip into mouse mode for a split second. It didn't happen often, and you can adjust the cooldown and activation time in the software. I actually found it pretty much perfect out of the gate, it just took a little getting used to. Scrolling has its own trigger (T to toggle, G to hold), which is convenient and a joy for quick pans and tilts. The one thing the Navigator can't do is auto-scroll by twisting the ball, which the single sensor design doesn't support. Some people would argue twisting requires lifting the hand, defeating the close-to-keys premise. I only partially agree, since I had to lift my hand to move the cursor anyway.
A real world example: I started using IA Writer for my scripts, with focus mode keeping the active text vertically centered. Using the arrow keys hidden under my right hand on layer 2, I jump between paragraphs without my eyes leaving the line. When the autocorrect misses something, the Navigator lets me lift my right hand the slightest bit to mark and select the area I need to fix. Top that off with a supercharged scroll speed, and I feel more connected to my words than ever before. It made me laugh at all my other cursor options, and believe me, I have a lot of those on my desk.
Software: Learning On The Fly
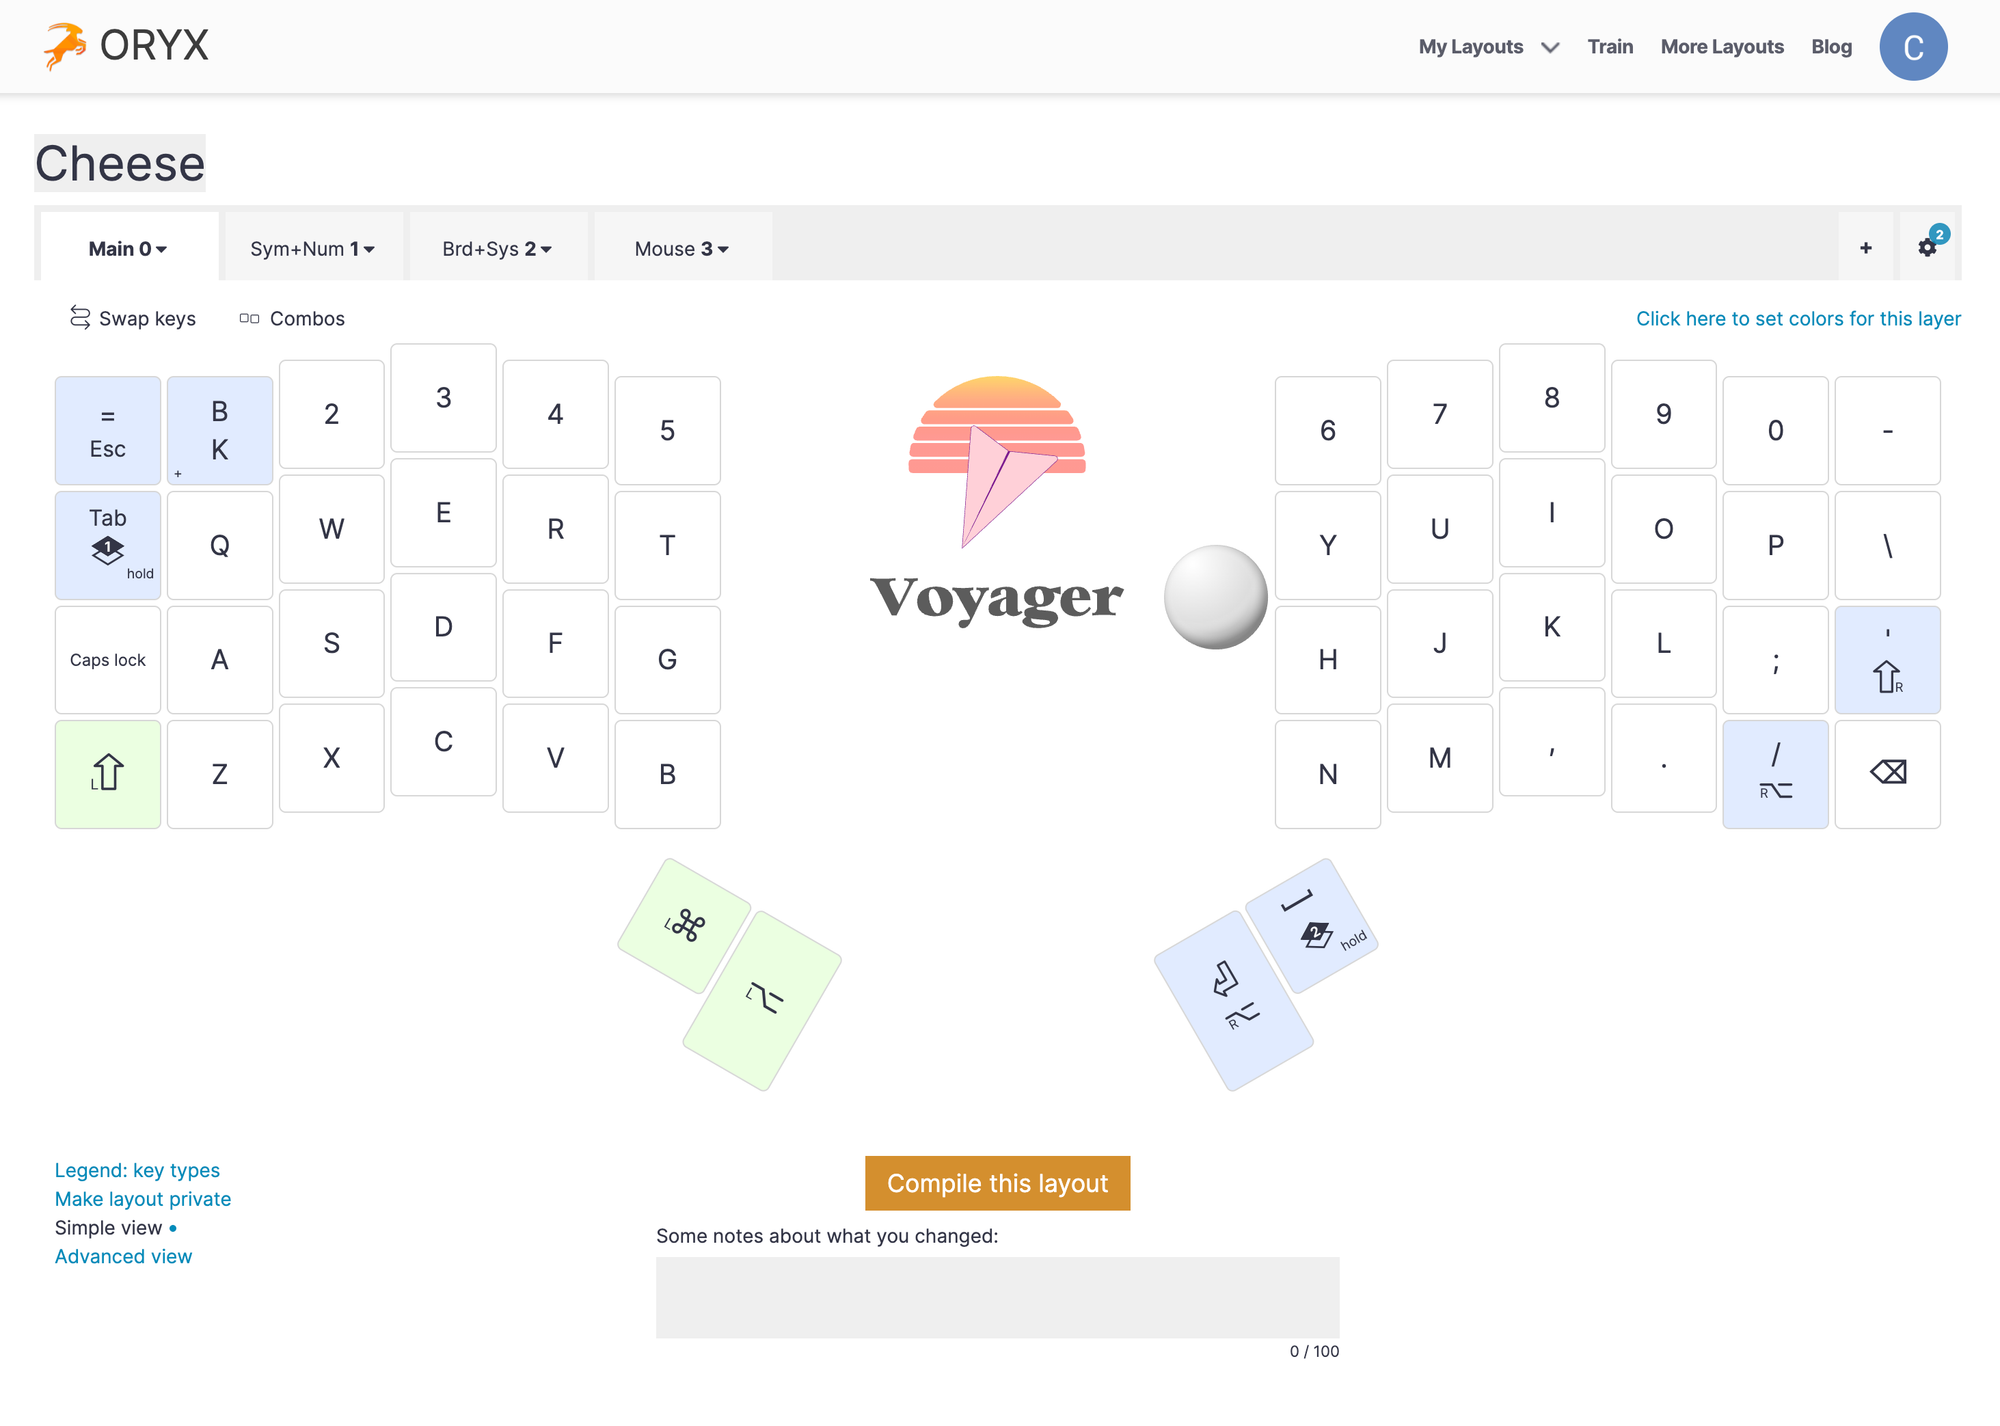
Unlike a more mainstream keyboard, on the Voyager you can change almost anything. Per-key assignments, layers, macros, and a heck of a lot more. That's because the Voyager runs on QMK, an open source keyboard firmware. Usually that means using VIA or VIAL, the two popular customization tools. ZSA decided to take another route and built their own, called Oryx. Initially I was a bit worried about a proprietary solution. When companies do this, it usually means fewer features and more frustration. Not here. You hit up the Oryx website and off you go.
Reassigning keys is the obvious starting point, and as soon as you do, you're treated to something I only knew about in theory. Your options aren't limited to a single key or function, but multiple ones, using different actuation types: tap (the standard), held (only activates when you hold), double-tap, and tap-and-hold. Held came in very handy for my thumb cluster problem. For video editing, my left hand is permanently on the keyboard while my right is handling all the cursor action. The left does a lot of heavy lifting, which is why I want all my modifiers readily available: command, alt, and of course space to play and pause. They all want to live on the thumb cluster, and with only two buttons I had one too few.
So: I assigned the first thumb button to plain command. The second is space when tapped, and ALT when held. As ridiculous as it sounds, this blew my mind. I know this feature existed long before the Voyager, ZSA didn't invent it. But they made it so accessible that even I can finally use it, and I love it. I have it set up for escape and the left shift too (which doubles as an additional backspace). It takes a little while to get used to, but once it clicks, it's super cool.
There are also combos, which let you create a trigger from up to six keys mashed at the same time. Sadly that means you can't hide a Konami themed easter egg in your config, but it's cool nonetheless. And RGB on a per-key basis depending on the active layer is right there too. You've probably noticed it in the Navigator section, where the corresponding keys lit up. That isn't default behavior, but it was very easy to set up.
Which brings us to the advanced settings. There's a lot in here, more than I can cover in a single sitting: fine tuning options for tap and hold, layer switching for the Navigator, even the ability to disable the Navigator's auto-switch and trigger mouse mode manually (avoiding the accidents I had). There's the world's most comprehensive list of RGB effects. For somebody who's never liked any of these, it was just fun looking at all the names and guessing the visual behavior based on the name (which I got wrong a lot).
What I want to highlight, especially, is that every single advanced setting has a very neat little description, written in a way that even I can understand. There's also a search feature that searches the descriptions, not just the setting names. It bookends the theme of not just giving you options, but acknowledging that the user might not be as experienced. For somebody insufferably lazy who also likes to tweak things a bit beyond the standards, it's perfect.
The one inconvenience is that every change requires a full recompile and a manual flashing process, because some of the more advanced features need that to work. VIA, as far as I understand, only changes high level configurations, allowing instant testing. I still prefer Oryx's approach over having multiple configuration paths depending on what you changed.
Finally, there's the Keymapp app, a desktop companion to Oryx that extends rather than replaces it. You get a heat map (which has highlighted that I still have a long way to go, based on my backspace usage), a live layout overview that shows what's typed and which layer is active (great as a second-monitor reference when learning a board), and smart layer switching that changes your layout based on the active application. The smart layer feature is something other boards have promised and not delivered. I can confirm it works on the Voyager, but having gotten so used to my keyboards not being able to do this, I have no immediate use for it. With a Naya Create style hardware module like the Tune, this would be a different story.
Conclusion: Perfectly Balanced (Almost)
Whenever I'm searching for a new keyboard (which happens more often than you might think), it always feels like I'm being forced to make a choice. Do I want that polished, everything-is-in-its-right-place experience? Or is the path of total customization, at the cost of ease of use, what I want? Balancing both equally seemed impossible, but the Voyager showed me just how close to perfection it can get.
The onboarding is as polished as they get, yet I still have the ability to go deeper if I want to. I didn't even go that far. Technically you could bypass everything and compile your own custom firmware. But why bother? There are more settings in Oryx than I could possibly ever need, and they're presented in ways and words I can actually understand. And if I truly dared to finally make that Colemak jump, I wouldn't have to painstakingly reassign every key. I could just use a layout another user has created, since these are shareable and trainable too, with built-in exercises.
This depth isn't limited to software. The hardware, with its predefined attachment points and the steel underbelly, opens the door to all kinds of modifications, not just first party ones. The Voyager has been out long enough that there's a sea of 3D printable accessories and creative setups out there to inspire basic users like me. Then there's the Navigator: an incredibly fun addition I can highly recommend. It won't, can't replace my main cursor (I just love my pen too much for that). But it's just conveniently close enough to do about 30 to 60% of what I need, and I miss it whenever I don't have it attached.
The Voyager is not perfect. I've already mentioned the manual recompile-and-flash process. I also had the occasional issue that, if the feet weren't perfectly aligned, the board would wobble just a little bit. Always remedied with a quick wiggle on the affected half. I also somehow ended up with two Qs, probably a slight mishap on the QA side, but nothing that bothered me much. ZSA did offer to send a replacement. I don't think it's a common issue, but worth mentioning.
My last complaint is something I haven't had time to tackle yet: the sound. With the stock Pro Reds and the Sunsets (a popular tactile switch), the board is acoustically flatlining. Granted, I have yet to hear a split that's as satisfying as one of my chunkier typewriter style boards. Experimenting with different switches would help. If you have any suggestions, especially for silent tactile choc switches, I'd love to hear them.
If I could make a final wish, it would be for a wireless version. Not just because I want to get rid of the ports and danglies, but because if Oryx ends up able to configure that board too, with the exact same feature set, well, that won't be flirting anymore. That might actually make me fall in love. Maybe even forever.
Thank you so much for reading! If you want more of this, check out the full video review or any of the other articles found here, cheers!
Mentioned Things
Pros
- Steel underbelly gives it premium feel and weight for the size
- Carrying case fits both halves with feet attached, making it a one carry solution
- Oryx Software is straightforward to use
- I discovered Tap/hold thanks to Oryx
- Navigator trackball is genuinely fun next to the keys and sped up workflows
Cons
- $365 base price ($534 with Navigator) is steep
- No third thumb key like a Corne (ended up not mattering with Tab/hold but might be a no-go for some)
- Keycap teeth feel plasticky and I managed to break one
- Every config change needs recompile and reflash (time-consuming)
- Stock switches sound acoustically flat