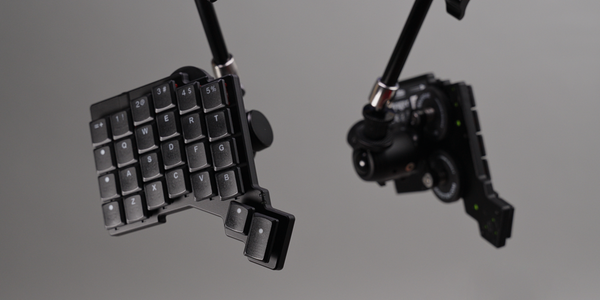
TL;DR After divorcing my Apple TV and leaving HomeKit behind, I moved to Home Assistant and picked up the Sanytron Astrion, a $180 remote built for it. It nearly caused a second breakup before a router mix-up got fixed, but that dependency turns out to be exactly what makes it worth having.
Leaving HomeKit Behind

If you saw my last video, you already know I recently divorced myself from my long-standing Apple TV relationship. That breakup incidentally forced me to find a new home for all my connected devices too, so along with Apple TV, I also left Apple's HomeKit.
Enter Home Assistant, the free, open source alternative that does everything HomeKit does, and a whole lot more. To control it, I picked up the Sanytron Astrion, a $180 smart remote built specifically for Home Assistant. Combined, the two nearly drove me into a second divorce, because for a while, they simply refused to work together. It took some time to figure out what I'd done wrong, and it's not even embarrassing.
Full disclosure: Sanytron sent me the Astrion for review. As usual, they didn't pay for this, didn't see it in advance, and had no influence over what I wrote. They did, however, offer some patient tech support.
What Home Assistant Actually Needs

Home Assistant is a hub, in case you've never heard of it: like Apple's HomeKit, but open source, and so much more. It's where you connect all your smart devices to control and script automations for. Being open source, it also has a large, active community putting out contributions and add-ons.
Just like HomeKit, it needs some kind of hardware base to run on. I used my TrueNAS server, though you don't need a full NAS box for it, the list of compatible hardware goes down to some pretty modest devices, and you can also just buy an official kit straight from Home Assistant if you'd rather skip the DIY route. However you install it, you get to it through the browser or the mobile companion app.
I won't walk through configuring every device, since it depends heavily on what you own and it's usually pretty straightforward. For the record though, everything I connected, my Philips Hue lights, CoreELEC/Kodi (where I watch all my movies and shows), a Bravia Android TV, an Onkyo AV receiver, and yes, even the outgoing Apple TV (kept around for demonstration purposes), had official Home Assistant integrations.
Setting Up the Astrion

Technically, none of what follows requires the remote at all. Home Assistant can be fully controlled from your smartphone. But as a true aspiring couch potato, I wanted the OG experience of holding a weighted, elongated object for a prolonged amount of time, and the Astrion is a comfortable hold thanks to its rounded-off back.
It's built specifically for Home Assistant, meaning it won't work without it, something I found out the hard way. Pairing it just means punching Home Assistant's IP address into the remote's web interface. The Astrion treated that as a stable, committed relationship. My router, on the other hand, treated it as an open house: about 24 to 48 hours after pairing, it would hand out a new address, breaking the engagement and leaving the remote stuck refusing to reconnect. No restart or Wi-Fi reset fixed it, only a fresh renewal of vows did. I won't say how long I did this dance before realizing what was wrong, but I've since set a static reservation on the router, and everything's been faithful since.
Once that's sorted, the actual controls come from RosCard, a Home Assistant integration maintained by Sanytron that ships a set of dashboard cards custom-built for the Astrion. That's also a dependency worth flagging: this functionality relies on Sanytron continuing to maintain it. If you'd rather not be tied to one company's card library, the Unfolded Circle Remote 3, which I covered a few months back, is a looser alternative.
Cards live inside dashboards, and dashboards have views, basically sub-groupings. I set up one dashboard for the remote with a view for media devices (CoreELEC box, TV, AV receiver) and another for lights and power switches. This piece focuses on the TV card specifically, since it's what controls media devices and the one I actually use daily. There are more card types from both Home Assistant itself and from RosCard, but the remote seems to ignore the native Home Assistant ones, which limits things more than I'd like.
Wiring Up Apple TV, Bravia, and CoreELEC

First up, the oldest, most stubborn member of the family: Apple TV. Integrate it into Home Assistant first, then add a new TV card (oddly still labeled "Unnamed TV Card" by default). Pick the remote model (HA100A in my case), select Apple TV, name it, done. Select the app and media player that should respond, both Apple TV here, and the remote's key mappings are yours to configure.
This is also where I ran into the Astrion's biggest weak spot: no physical media transport controls. The touchscreen handles play, pause, and skip by default, and while you can remap one of the custom buttons at the bottom of the remote to cover it, it's not the same as a dedicated button, something the Unfolded Circle Remote 3 does have. Still, once mapped, Apple TV control works surprisingly well. The D-pad in particular feels genuinely nice, shallow clicks but a near delay-free response that makes navigating painless, even if it's not physically distinguished enough from the surrounding buttons to find in the dark.
The Bravia Android TV setup mirrors Apple TV almost exactly: add a TV card, pick Android TV as the remote type, map the buttons through its Remote entity. Same prerequisite: the TV needs to already be connected to Home Assistant. Worth remembering here, the Astrion never talks to your devices directly, it only ever talks to Home Assistant, which then relays the command.
CoreELEC, my main box for movies and shows, connects to Home Assistant the same way, just make sure "Allow remote control via HTTP" and "Allow remote control from applications on other systems" are switched on first, then hook it up via the Kodi integration (CoreELEC is Kodi under the hood). But adding the TV card exposed a real limitation: Kodi's controls aren't exposed the way Apple and Android TV's are, so I had to build them myself.
Scripting Kodi Controls By Hand

Getting CoreELEC/Kodi controls mappable meant writing a custom configuration file inside Home Assistant's packages folder, done straight from the web UI using an add-on called Studio Code Server (you can also do this directly on the filesystem, but that requires standing up, which defeats the whole point of any of this). Before adding it, Home Assistant needs to know the folder exists: inside configuration.yaml, add a homeassistant block with packages pointing at it.
Each command is a key, with an alias (the name shown in the UI later), a mode set to queued so rapid presses don't step on each other, an action, and an entity_id, the actual target that should react. That last one took embarrassingly long to track down, even for integrations I'd named myself, until I learned you can look it up under Developer Tools, then States, and search for media_player. Finally, there's a method, which tells Kodi what to actually do, and these happen to be well documented on Kodi's own API page. With all of that in place, the CoreELEC TV card finally lit up with real Kodi commands, individually mappable to physical buttons, and just like that, CoreELEC was controllable exactly like the other two.
Filling the Gaps With Infrared

But what about devices that aren't smart enough, or where the integration isn't smooth? That's where IR comes in. The Astrion actually shipped with an IR blaster on board from day one, it just wasn't activated until firmware 1.2.0 landed in June.
Getting it running means installing another integration, Astrion Home, again through the community store via a GitHub link. From there you add IR devices through a configuration cog: pick the device type, then the brand. The brand list is long, but don't get too excited, plenty of entries are empty, and even the ones with data don't always have as much as you'd hope. Sony TVs are the example that bit me: none of the three available Sony options include a power command, all of them ship two unrelated ones instead. The documentation claims you can add custom IR commands, but none I tried actually worked. I got curious about how the working, pre-included commands were stored, hoping to reverse-engineer one, but they turned out to be encoded, a dead end. Digging through the Astrion Home integration's files didn't turn up any stored codes either, which suggests they're pulled from a Sanytron database on demand whenever a device is added through the UI. If that's accurate, it's the same kind of dependency risk as RosCard: no connection to Sanytron's servers, no new IR codes.
If you want a way around that, Home Assistant also supports SmartIR, a community integration with a much bigger code library. The catch: it doesn't use the Astrion's built-in blaster at all, you'll need separate hardware like a Broadlink or an ESPHome device. That does mean one more box in the pile, but it also buys you something the Astrion still can't do: learning IR commands directly from an existing remote.
For my Onkyo AV receiver, which does have a full Home Assistant integration, I used IR anyway. Controlling volume over the network introduces a noticeable delay, and since the receiver is something I adjust constantly without needing any context about what's playing, IR is just faster. It's also a nice showcase of a feature I like about the Astrion: you can mix and match control types, IR, network, whatever works, within the same card.
Building a Theater-Style Lighting Setup

The actual reason I wanted all of this: I like the theater experience, and I wanted my apartment's lights to react to whatever I'm watching, to the horror of everyone else living here. That means three scenes, Movies, TV Shows, and Bright, triggered whenever I start playing something, when it finishes, or when I hit pause (typically to sneak off to the bathroom, a tradeoff I've made peace with). For movies specifically, once the end credits start rolling, the lights come back up automatically, just like at an actual theater.
These automations took forever to get right, though in hindsight they're fairly simple. You don't have to build this from scratch either, Home Assistant ships blueprints, pre-made automation templates where you just fill in the blanks, and a few of them already cover the basic dim-on-play, brighten-on-pause pattern. I built mine manually instead, mostly because I wanted separate scenes for movies versus TV shows and had to work around Kodi's fairly creative approach to reporting its own playback state.
Each automation watches Kodi's state through its Home Assistant integration. The TV show automation, for example, waits six seconds after playback starts, checks whether the content is a TV show or episode, and if so, fires a scene that's slightly dimmer than the movie one. A separate automation brings the lights back to the bright scene on pause, stop, idle, or standby, meaning even an unofficial bathroom break, hit via the touchscreen, since there's no physical stop button, still triggers it. None of this accounts for time of day by default, but that's easy enough to layer in through the UI if you don't want your lights dimming at 2pm.
The credits automation works differently: it uses Jellyfin's media segments as a trigger, which needs a Jellyfin server (or similar) reporting where the playhead is, via an add-on called Intro Skipper. That add-on is also what gave me the idea in the first place, since it already adds skip-intro and skip-credits buttons. Wherever it detects the credits starting, it fires the bright scene, and the lights come back up right on cue. It's admittedly a lot of moving parts, Home Assistant, Jellyfin, Intro Skipper, and the Astrion itself, but if you've read this far, there's a decent chance you already own at least one of them.
The Verdict

Once I got past the router issue, I ended up genuinely happy with this setup, though I was pretty split on it before that fix landed. My first impression of the Astrion's simplicity wasn't great either, especially next to something like the Unfolded Circle Remote 3. But once I stopped expecting it to do more, I actually appreciated the restraint: I don't have automated shutters or an AC unit, so I don't miss the dedicated buttons for either. I do wish it had physical media transport controls, though the custom buttons claw back some of that.
For what I actually wanted, a straightforward way to run my home entertainment and occasionally enjoy physical media, it's plenty. Is $180 worth of "plenty"? For me, yes, but like any good relationship, it needs the occasional threesome: if the Astrion worked entirely on its own, without Home Assistant, I wouldn't be having nearly as much fun with it.
The initial connection drama made that dependency obvious the hard way, but it also highlighted something else. Resetting the remote itself took almost no time, because nearly all the actual configuration lives inside Home Assistant, a hub I've come to trust a lot more than I expected to. It's not going anywhere anytime soon. Maybe this is the one that finally makes me settle down.
Mentioned Things
Pros
- Easy control once every device is wired into Home Assistant
- Comfortable to hold for a prolonged time
- Mixes IR, network, and scripted controls on one card
- Resetting it barely matters, config lives in Home Assistant
Cons
- Completely reliant on Home Assistant
- No dedicated physical media buttons
- IR code library is incomplete (Sony example)
- DHCP lease changes can silently break the connection
- RosCard support depends on Sanytron's continued maintenance